Unity SDK Walkthrough
- SDK Version:
2.8.264
- Oldest Supported version of Unity:
2020.3
Below you’ll find our handy SDK walkthrough guide to using the AdInMo SDK with your game project within Unity.
Register with AdInMo
To begin using the AdInMo SDK, you need to create an account on our developer portal.
Go to AdInMo Website , select the ‘Portal’ dropdown and click Sign Up. You can sign up using your email address or your Google account.
Fill in the appropriate details and confirm your account using the instructions given. If signing up via email you will be asked to confirm your account.
Portal: Creating a Game
A Game is a representation of your game within AdInMo. During this process you will create a Game Key that is required to work with the AdInMo SDK, please keep this information private.
Login to your developer account on AdInMo and Click the + Add New Game button.
Fill in the details of your game and click Save. These details can be edited at any time.
Each game has its own game key, this can be viewed on the details page of a game. You will need this game key later on in the process.
To view the details of your game, simply click the name of the game you want to view, either on the overview or game list page.
Portal: Creating a Placement
This part requires at least one game on the portal.
Placements are simply objects which will display an advertisement, they must contain a Unity 2D texture. One game can support multiple placements.
During this process you will create a Placement Key that is required to work with the AdInMo SDK, please keep this information private.
View the game you wish to create a placement for on the portal and click the, + Add New Placement button, if you already have any placements they can be viewed here.
Fill out the details of your placement and select an aspect ratio. Placements can be edited at any time.
Each placement has its own placement key, this can be found on the placement list. You will need this placement key later on in the walkthrough.
Portal: Adding a test device
Adding a test device will enable us to look in more details on our side if you experiense any issues.
To add a test device, go your profile on the portal and select the game you wish to add the device on.
From the menu, choose Test devices and then ‘Add test device’. You’ll be presented with a list of devices which have accessed your app, along with their UID, session start and IP address.
Choose a device and click Add Device.
Portal: Cross Promotion Ads
Cross Promotion Ads allow you to use unfilled ad placements to promote other games in your portfolio. Remember these are immersive non-clickable ads so simple creatives focused on logos and character art will work best.
Choose an image in accordance with the supported aspect ratios.
The image must be in JPEG or PNG format and should not exceed 1MB in size.
When you’re ready for the campaign to go live please drop us a quick email to support@adinmo.com. We will then do a quick brand safety and copyright check and then put your campaign live.
Setting up the SDK within Unity
After you’ve set up the account, you can then download our latest SDK here
Oldest Supported version of Unity 2018.4
Release notes for the AdInMo SDK can be found here
When updating an older version of the AdInMo SDK, the best practice is to delete the existing AdInMo folder in assets before importing the latest version of the SDK.
After you’ve downloaded the SDK, create or open a project within Unity Editor. If you’ve downloading from the Unity Asset Store, you can either import from the package manager or through the asset store tab depending on the unity version.
From the top menu, click Assets > Import Package > Custom Package and locate the Unity package containing the SDK. Ensure all the items are selected and click Import.
You should now see a folder called Adinmo displayed in the Unity Assets window.
AdInMo Manager
First, the AdinmoManager prefab needs to be added to the scene. Next, copy and paste the game key of your game into the AdinmoManager.
From the Assets window, select Adinmo > Prefabs and click and drag the prefab called Adinmo Manager into the scene hierarchy.
If you are working on a development build, please check this box on the Adinmo Manager.
Navigate back to the portal and to the appropriate game, view the details of the game on the portal and copy the game key (starts with gk…). In Unity Editor, click on the AdinmoManager prefab and paste the copied game key in the game key field.
You can report your application version through the Adinmo Manager inspector by adding it in the Application Version field.
Adding placements
AdInMo SDK 2.0 supports game objects templates (image, quad and sprites) of different aspect ratios that you can add to your scene without the need to manually create them.
Go to the AdInMo folder in the assets window and select prefabs.
From here, you can select the appropriate game folder for the game object you want to add. Each game object is named with its aspect ratio.
Paste the placement key of the placement from the portal into the placement key field. Placement keys start with ‘pk…’
Test your project directly in editor by hitting Play. You can enable AdInMo’s Debug tool from Adinmo>Manager which will give you important information about your placement setting.
5. To set Audio ads: | - Drag and drop the Audio prefab to an existing or a new canvas. | - You will now see the Audio icon present in your scene. The prefab is disabled by default and the icon will not be visible during runtime until an ad is ready to play. | - From within the prefab you can move the icon to where you want it to show in-game. It will remain hidden until an ad is ready to play. The icon is set to scale with the reference resolution on the canvas and by default is set to 100x100 pixels.
NOTE The icon should be placed in an area of the game that is visible to the user but not disruptive to the game experience.
6. To set Rewarded InGamePlay | - Create a canvas or use an existing one. Icon and popup will scale with Reference Resolution. We suggest 1920x1080 for portrait or 1080x1920 for landscape, | - Drag and drop the ZebedeePrefab onto the canvas - you can choose Portrait or Landscape based on your setup.

.png)
SDK 2.5.253 simplifies how ad placement sizes are managed with four Placement Types supported:
Square (min 250 x 250 pixels)
TV (min 480 x 320 pixels)
Portrait (min 320 x 480 pixels)
Landscape (min 320 x 50 pixels)
The four Ad Placement Types map to IAB’s Fixed Size Ad Specifications and support all display and video ad units for maximum demand opportunities. Aspect ratios that do not match these Placement Types are deprecated and no longer be added to your game. Existing ad placements will continue to serve ads but will generate less revenue and we recommend editing all placements to use one of the four Ad Placement Types.
Make sure to set your texture quality High. You can set it by going to Project Settings>Quality>Texture Settings. This will allow you to scale the placement if your project requires it and still have a high quality ad. This will not affect your app’s performance.
AdinmoTexture Component
If you want to create your own game object from scratch, you can use the AdInMo texture component on the game object that will act as the advertising placement within your game.
Create a game object, either an image, quad or sprite, select the game object in the scene and click Add Component in the inspector window.
In the search box, type and select Adinmo Texture.
Paste the placement key of the placement from the portal into the Adinmo Texture component, Placement keys start with pk…
NOTE Keep in mind this method is prone to errors and it’s always best to use the prefabs.
App-ads.txt
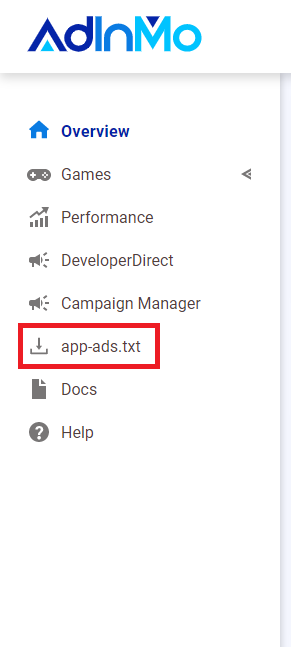
Non-existing app-ads.txt file:
Download the latest app-ads.txt file from your portal page.
Ensure your web server can serve your developer url as plain text.
Place the app-ads.txt file provided in the root directory of your website.
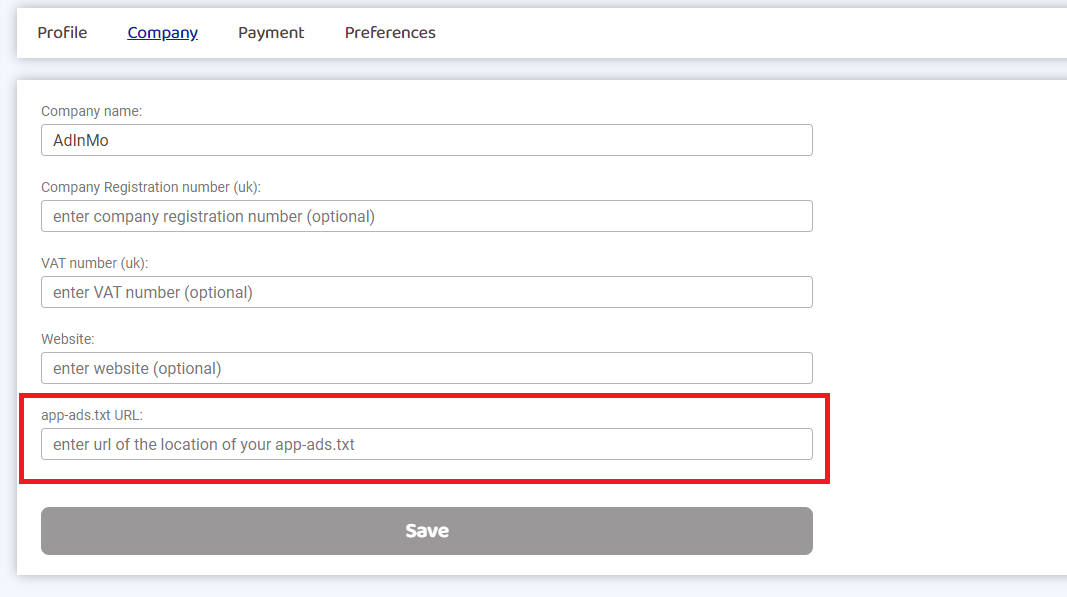
Add the URL containing your app-ads.txt file on your Company profile in the portal. This step is crucial so we can verify it.
NOTE
NOTE
User Consent GDPR
Accessing the advertising ID in Android API33 and above
In version 33 of the Android SDK it is no longer possible to access the advertising id without adding an additional permission to the Android Manifest. In this case there will be an warning in logcat like this:- Package <your app_id> failed Ad Id permission check. Apps that target Android SDK 33 or higher should declare com.google.android.gms.permission.AD_ID in the app manifest to access Ad Id. And result in AdInMo not being sent the correct advertising id during the bidding process, which could result in reduced income for Android devices. Of course, you could fix this by compiling against an earlier version of the Android SDK, but this is not recommended. The preferred fix is to add the missing permission to the Android Manifest
Adding Missing Permission

1<uses-permission android:name="com.google.android.gms.permission.AD_ID"/>
tag just above the closing tag ‘</manifest>’ as indicated below:

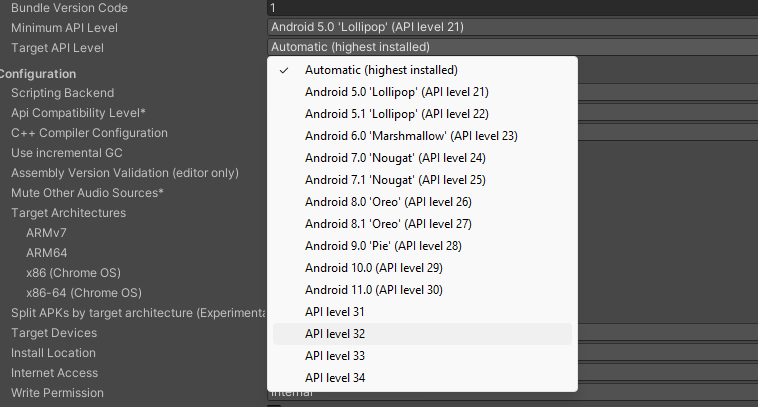
Downgrading Android SDK
If it is preferable instead to downgrade the SDK version used instead. Here is what you would do:
In both cases the warning should no longer appear in logcat, and AdInMo will now receive the correct advertising id.
Using AdMob’s UMP plugin to validate GDPR consent
Setup Admob
These instructions only work if you have a working Admob account via https://apps.admob.com/ for the game that you want to use. It may be possible to create an Admob account and register your game without actually having integrated Admob into your project, but at the bear minimum this will require your game to be live on the app store. Note that you may need to temporarily disable any adblocker before using the site. Once you have a working Admob account, use the following instructions to setup GDPR verification.
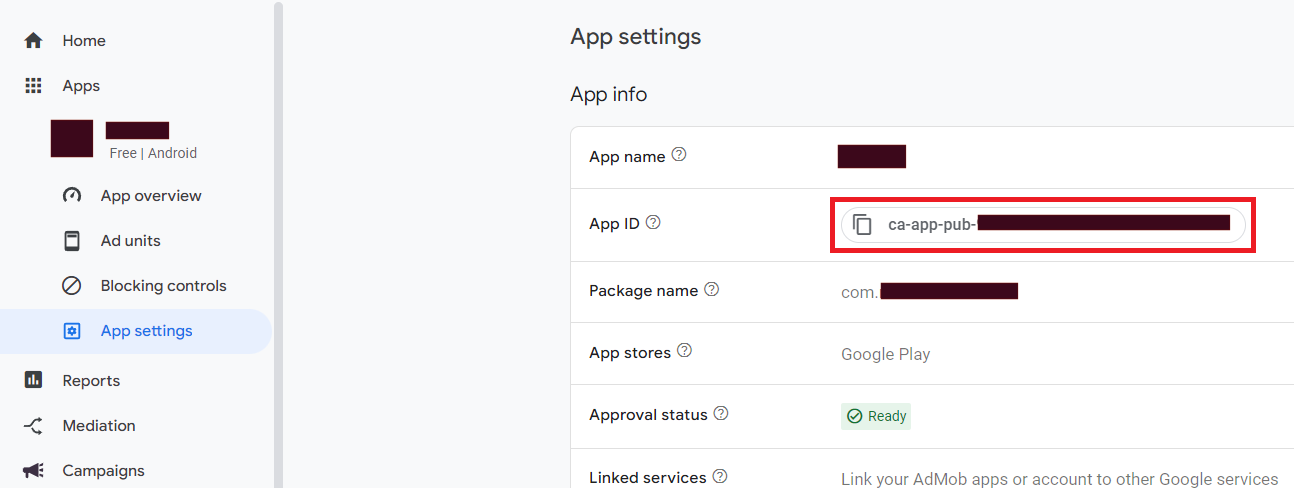
From your Apps. Find your game, and make a note of the App ID (starts with ca-app-pub-), you will need this further down the process where it’s mentioned as Admob App Id
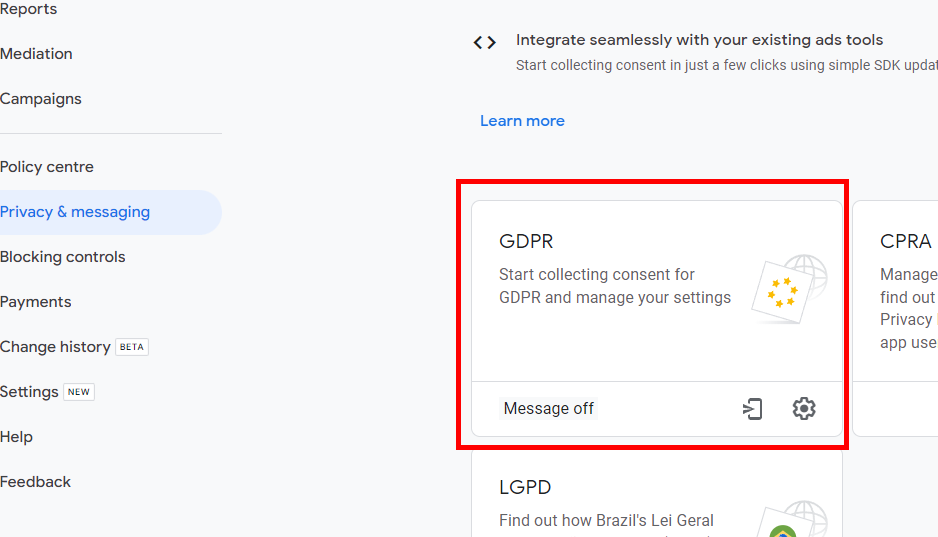
From Privacy & messaging click GDPR
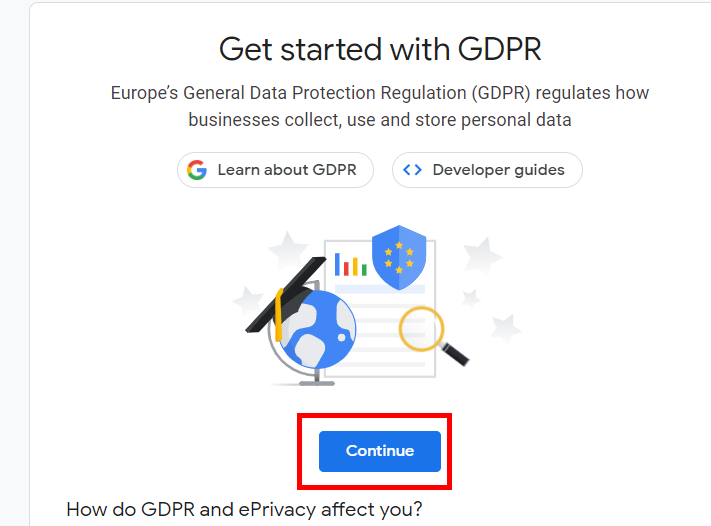
Click Continue
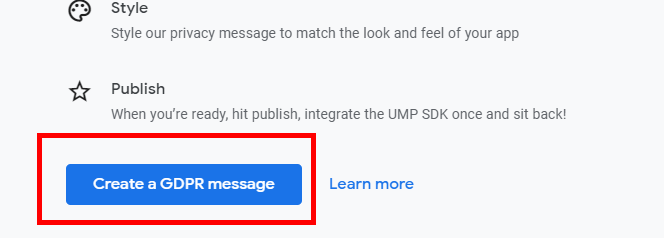
Click “Create a GDPR message”
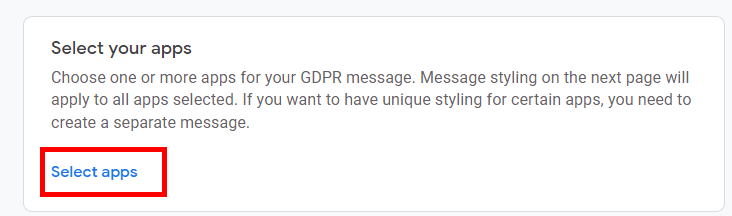
Click Select Apps
Select your app that you want to apply this too, you will need to set a privacy policy URL, and confirm
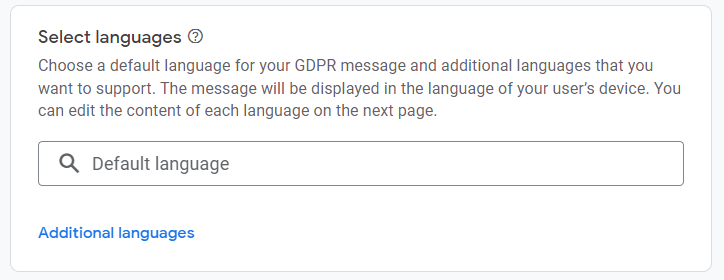
Set up you language preferences
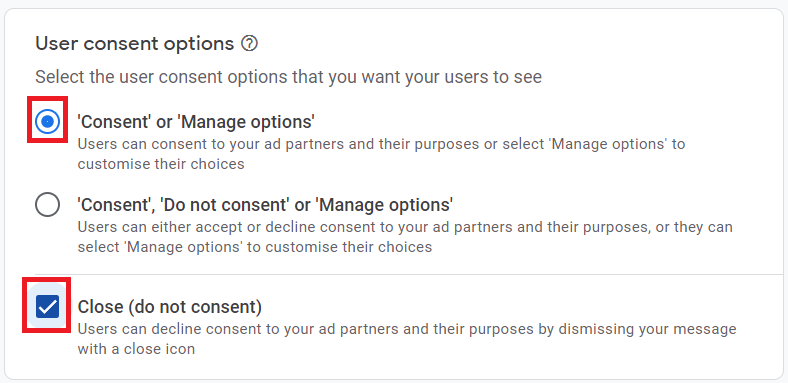
Setup your user consent options, you will need the first option, ‘Consent’ or ‘Manage options’, and the check the Close (do not consent)
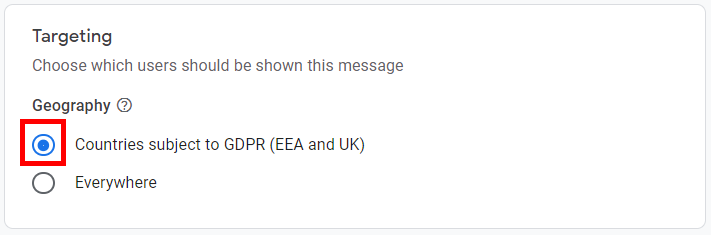
Targeting should be for Countries subject to GDPR
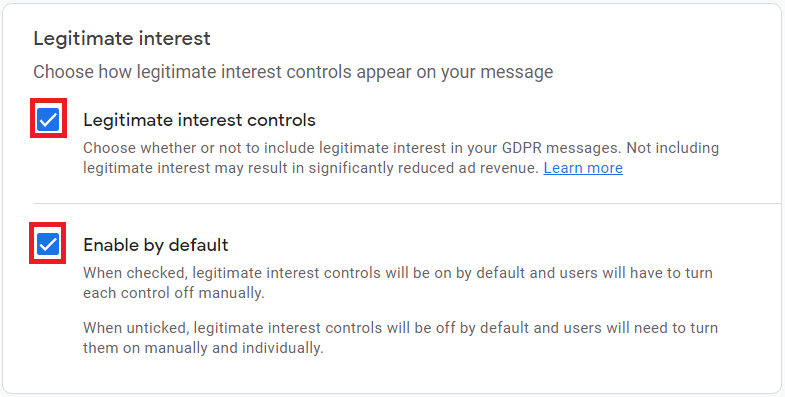
In the Review your account settings section tick both boxes
Click Review your ad partners
Find Adinmo Ltd in the list and add it
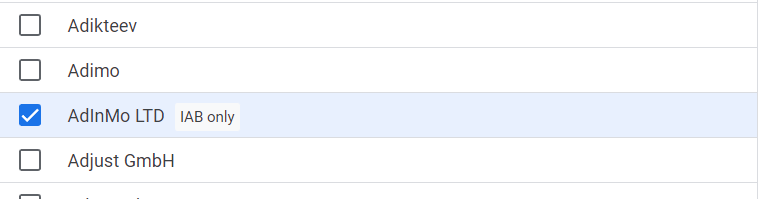
Click Confirm
Click Add purposes
Configure the usages as per your own preferences, but we recommend the following settings will maximise potential earnings
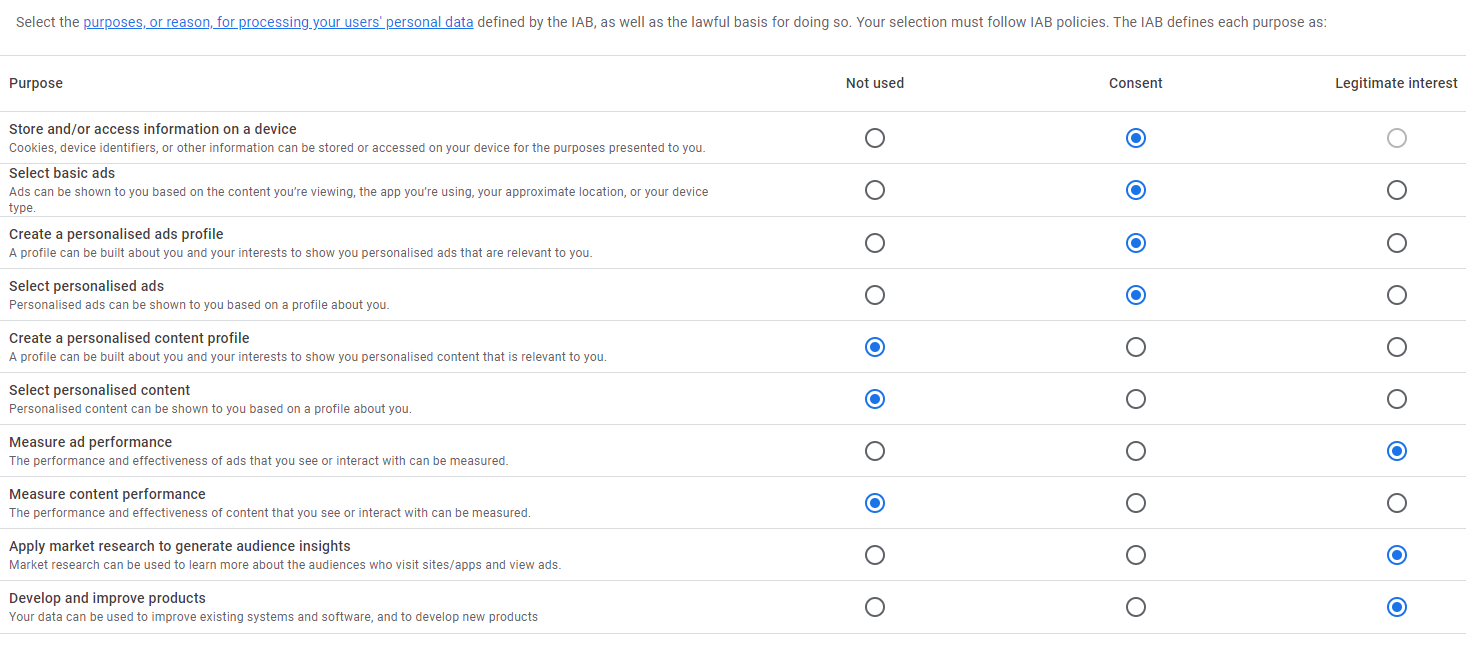
Press confirm
Press continue and you should be presented with a preview of what your consent dialog will look like
Give your message a name and press publish
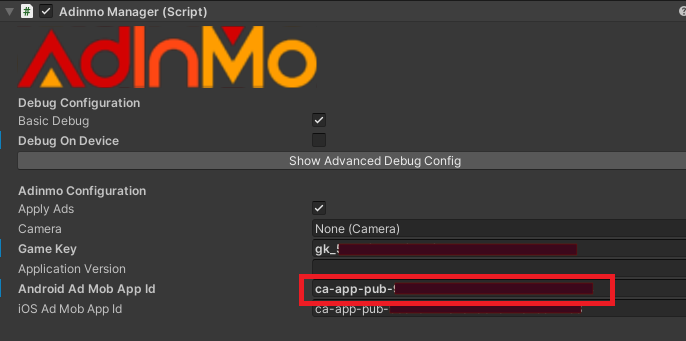
Android Specific Setup Instructions
Get Admob Application id for your android app and add it to AdinmoManager Object like this:
Add the required dependencies for UMP to an Android build:
Install External Dependency Manager
After installing the unitypackage, it will ask you if you want to auto resolve, if you click ‘Yes’, that is all you need to do
If you click ‘No’, you can do the resolve by using Assets > External Dependency Manager > Android Resolver > resolve
After a while when it copies all the missing dependencies to the Plugins/Android folder, it will complete and you can run the build
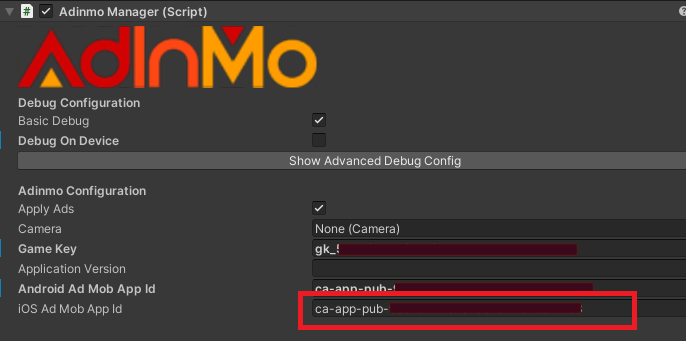
iOS Specific Setup Instructions
Get Admob Application id for your iOS app and add it to AdinmoManager Object like this:
Add the required dependencies for UMP to an iOS build:
Make sure you have CocoaPods installed on your development machine
Install External Dependency Manager
Build your app as usual
Note, this setup will not support bitcode
Using UMP
After AdinmoManager has been initiated, there are 2 functions you can use to trigger UMP events:
1static void AdinmoManager.CheckConsent([Optional]UMPCallback resultCallback)
Call this at a convenient time during startup. If consent is required, and hasn’t been determined yet, this will launch a popup asking for consent options, otherwise it will notify adinmo about previously selected options saved in the prefs.
1static void AdinmoManager.ResetConsent([Optional]UMPCallback resultCallback)
This will reset the consent received state and bring up a fresh popup. This is designed to be used in the game menus to allow the user to change their mind about their previously selected consent options
Where UMPCallback is an optional delegate of the format:
1void UMPCallback(bool consentWasRequired, bool canShowAds, bool canShowPersonalisedAds, string TCF_String);
You can use it to receive the results of the dialog box for your own purposes.
Using UserCentrics
Guides on how to setup Usercentrics can be found here Usercentrics Documentation and a guide to setting up their SDK can be found here Introduction - Usercentrics Apps SDK. While setting up Usercentrics, ensure that AdInMo Ltd is enabled as a vendor
NOTE
Finished!
Run your game and advertisements will appear in your game.
For support, please check our FAQ.
Please Note!
You will not be able to see impressions using a development build, uncheck this option if you are building a release.
Unity Editor also has its own development build option under File, Build Settings. Ensure the Development Build option is not checked when building for release.